The Ever-Changing Brush
Jan. 16th, 2021 03:18 pm(I actually have not had brush painting class for quite a while, due to COVID concerns, but I am still catching up on summaries from when I did; writing them helps me remember what I learned. I hope.)
One of the other students asked the instructor to teach us how to apply colour. She has done small demonstrations of colour here and there before, and I've done some colouring extrapolating from what she's said, laying down multiple thin layers of different colours, but today she explained how to do it right. I was not doing it right.
First she coloured this black and white picture of waves striking a rocky shore:

to this, which isn't finished, but she didn't want to spend the whole lesson time working on it:

Basically, the secret to the subtle shadings of light and dark is not - as I was doing - to put down a layer of colour over a whole area to be "light" and then to come back later and put a second layer of a dark colour over just the shadowy parts. Instead, you have the light and the dark colour in your brush at the same time, and put your brush down on the paper in such a way that they end up in the right places.
This is similar to the way black ink is applied, where the tip of the brush is much inkier, and fades back to zero ink where the hairs meet the handle, and you learn different strokes to hit different parts of the brush against the paper and make different textures.
For the rest of the class, we did technique drills, trying to get multiple colours onto the brush in a clear smooth way. You put one colour on the brush, and then dip it into the next colour in such a way that the first colour scoots back up the brush, which requires having just the right amount of water.
Here's my first success! It's blue at the tip, green in the middle, and yellow at the back.

Here's how you know it's a success: you can make a smooth multicoloured stroke, which is what you would do to colour a black and white scene:

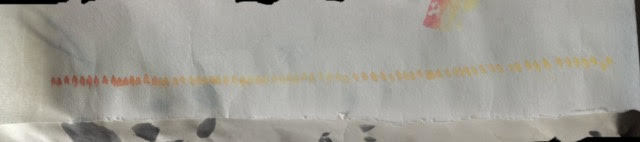
As you use the tip of the brush, the blue will be used up, then the green, then finally the yellow. The colours flow down to the tip of the brush as the one in front of them flows onto the paper. Like pez. If you do it right, every stroke you make with the brush is a slightly different colour - this is just a row of dots with the brush shown above.

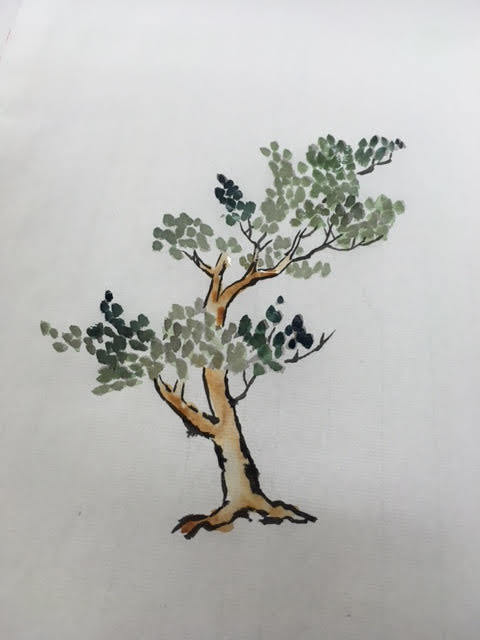
If you do it right, it feels magical. An enchanted paintbrush that changes colour on its own. I really enjoyed this, and feel like I mostly got the hang of the technique. She had us do trees whose leaves were dots drawn by the ever-changing paintbrush:
I did colour brush drills at home, as well. Here's a magenta-orange-yellow brush:

And the row of test dots from the enchanted brush:
And an autumnal maple tree!

I'm not sure how to put the coloured brush on paper yet, but I now know how to put colour on the brush! Progress!
One of the other students asked the instructor to teach us how to apply colour. She has done small demonstrations of colour here and there before, and I've done some colouring extrapolating from what she's said, laying down multiple thin layers of different colours, but today she explained how to do it right. I was not doing it right.
First she coloured this black and white picture of waves striking a rocky shore:
to this, which isn't finished, but she didn't want to spend the whole lesson time working on it:
Basically, the secret to the subtle shadings of light and dark is not - as I was doing - to put down a layer of colour over a whole area to be "light" and then to come back later and put a second layer of a dark colour over just the shadowy parts. Instead, you have the light and the dark colour in your brush at the same time, and put your brush down on the paper in such a way that they end up in the right places.
This is similar to the way black ink is applied, where the tip of the brush is much inkier, and fades back to zero ink where the hairs meet the handle, and you learn different strokes to hit different parts of the brush against the paper and make different textures.
For the rest of the class, we did technique drills, trying to get multiple colours onto the brush in a clear smooth way. You put one colour on the brush, and then dip it into the next colour in such a way that the first colour scoots back up the brush, which requires having just the right amount of water.
Here's my first success! It's blue at the tip, green in the middle, and yellow at the back.
Here's how you know it's a success: you can make a smooth multicoloured stroke, which is what you would do to colour a black and white scene:
As you use the tip of the brush, the blue will be used up, then the green, then finally the yellow. The colours flow down to the tip of the brush as the one in front of them flows onto the paper. Like pez. If you do it right, every stroke you make with the brush is a slightly different colour - this is just a row of dots with the brush shown above.
If you do it right, it feels magical. An enchanted paintbrush that changes colour on its own. I really enjoyed this, and feel like I mostly got the hang of the technique. She had us do trees whose leaves were dots drawn by the ever-changing paintbrush:
I did colour brush drills at home, as well. Here's a magenta-orange-yellow brush:
And the row of test dots from the enchanted brush:
And an autumnal maple tree!
I'm not sure how to put the coloured brush on paper yet, but I now know how to put colour on the brush! Progress!
no subject
Date: 2021-01-17 12:09 am (UTC)no subject
Date: 2021-01-19 06:41 pm (UTC)Also, now all I can see on that rock on the right is a badger coming to a river to drink.
no subject
Date: 2021-01-17 03:30 am (UTC)no subject
Date: 2021-01-20 01:31 am (UTC)look I don't even go here but
that kind of art is
HOLY CATS THAT IS JUST SORCERY